Looking to embed Twitch streams on your website? This guide covers everything you need to know to manually embed Twitch streams on any platform — whether you’re using WordPress, Wix, Squarespace, or custom HTML.
If you’re specifically using WordPress, check out our dedicated guide: How to Embed Twitch Streams on WordPress.
Here at StreamWeasels, we’ve been working to embed Twitch streams for over 5 years, and in that time we like to think we’ve gotten pretty good at it. Twitch is the largest live-streaming platform on the web, with over 3 million average monthly users. There is plenty of content on Twitch for you to embed in your website and in this guide, we’re going to show you how.
There are a few different ways to embed Twitch streams on your website. There are simple ways to embed Twitch streams and more complicated ways that allow for greater customization and layout options. Here we are going to outline the different methods you can use to embed Twitch streams in your website, quickly and easily.
How to Embed Twitch Streams (The Easy Way)
The absolute easiest way to embed Twitch streams on your website is by using the StreamWeasels Twitch Embed Code Generator Tool. This tool allows you to generate custom Twitch embed codes for channels, videos, and clips — with options to adjust size, aspect ratio, autoplay, and more.
With this tool, you don’t need to manually modify the embed code or worry about getting the parent parameter correct. It handles everything for you.
How to Use the Twitch Embed Code Generator:
- Enter your Twitch URL (channel, video, or clip).
- Customize your embed settings (Size, Aspect Ratio, Autoplay, Mute).
- Copy the generated iframe code.
- Paste the code into your website’s HTML.
Example Embed Code Generated by the Twitch Embed Generator:
<div style="aspect-ratio:16/9; max-width:600px;">
    <iframe src="https://player.twitch.tv/?channel=lirik&parent=streamweasels.com" frameborder="0" allowfullscreen="true" scrolling="no" width="100%" height="100%"></iframe>
</div>
How to Embed Twitch Streams (The Manual Way)
Step 1: Find the Twitch Embed Code
If you prefer to manually create your Twitch embed code, Twitch provides a built-in embedding system. Here’s how to do it:
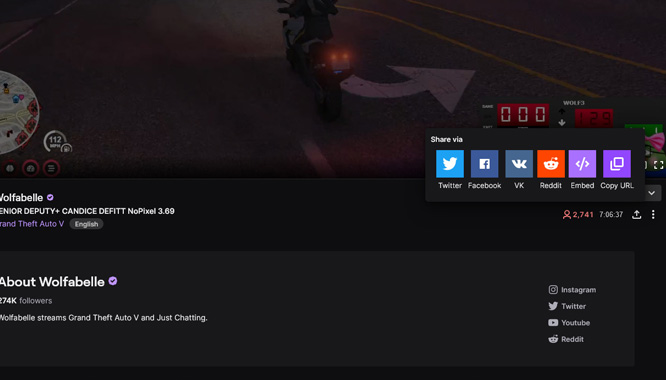
- Go to the Twitch stream you want to embed.
- Click the Share icon in the bottom right.
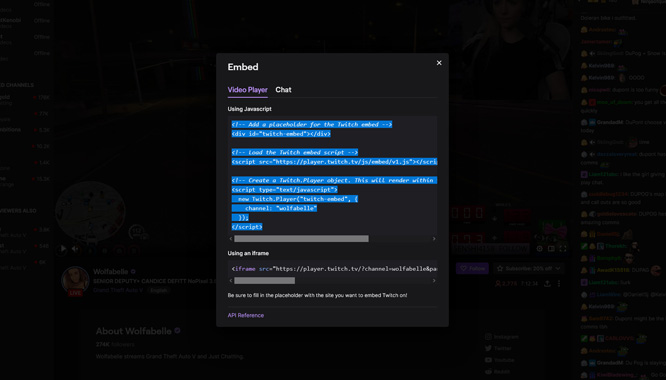
- Choose Embed from the options.


Step 2: Copy the Embed Code
Twitch will give you two options:
- JavaScript Embed (recommended by Twitch)
- Iframe Embed (widely supported across platforms)
Step 3: Modify the iframe Embed Code
If you choose the iframe option, you’ll need to adjust the parent parameter in the embed code.
The second option is to embed the Twitch stream using an iframe. Some users may find using an iframe more convenient, as iframes are widely supported on the web. In this case, copy the entirety of the iframe code and paste it into your website. There is one extra step when using the iframe, and that is to find the text in the iframe code &parent=www.example.com and replace www.example.com with your own website URL.
For example, to embed a Twitch iframe on our own site we would change this:
<iframe src="https://player.twitch.tv/?channel=wolfabelle&parent=www.example.com" frameborder="0" allowfullscreen="true" scrolling="no" height="378" width="620"></iframe>to this:
<iframe src="https://player.twitch.tv/?channel=wolfabelle&parent=www.streamweasels.com" frameborder="0" allowfullscreen="true" scrolling="no" height="378" width="620"></iframe>Ready to embed your Twitch content?
Use the Twitch Embed Code Generator to create your custom embed code in seconds:
Common errors when embedding Twitch content
With all of our experience embedding Twitch content on the web, we have likely come across every Twitch embed error that is out there. Thankfully, some of the most common Twitch embed errors have very simple fixes which we are going to show you below.
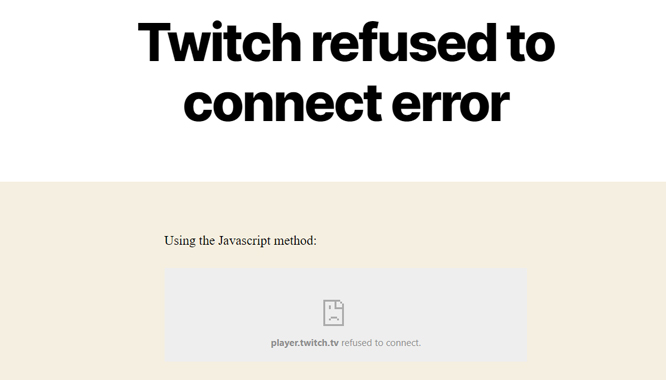
player.twitch.tv refused to connect error
The Twitch embed refused to connect error is quite a common one that we see all the time. This one has a straightforward solution, however, to many non-technical users it could be considered complex.

Basically, the player.twitch.tv refused to connect error is caused by Twitch’s own policy of not allowing Twitch embedded content on websites that do not appear secure with a valid SSL certificate (also known as https://).
As outlined in this post from 2020 on the official Twitch developers forum, see this quote from Jon Bulava, Twitch Staff:
With this new configuration, Twitch embeds can only be embedded on https sites. Non-https sites should plan accordingly if they intend on continued use of any Twitch embed experiences that are currently in operation on their site.
How to fix the Twitch refused to connect error
So the reason your Twitch embed is displaying a Twitch refused to connect error is because your website is considered insecure. The solution to this problem is usually to contact your web hosting provider and ask them to help you set up an SSL certificate for your website. If you consider yourself a technical user and you have full unrestricted access to your web server, you may be able to do this yourself, but if not this guide from website builder expert might help.
In Conclusion
At StreamWeasels, we’re passionate about making it easier for streamers and website owners to embed Twitch content seamlessly. While Twitch provides a solid embed solution, our Twitch Embed Code Generator takes it a step further by offering a customizable, hassle-free experience for embedding channels, videos, and clips on any website.
If you’re specifically in the WordPress space and need a reliable, flexible way to embed Twitch streams, our StreamWeasels Twitch Integration Plugin has you covered with powerful features and layouts that go beyond the basic embed options.
We encourage you to explore our tools and plugins, and if you have any questions, please don’t hesitate to reach out to us.
